Free resources
Free website templates
Original website templates for SaaS companies, AI products, freelancers and fractional leaders, platforms, and agencies. Each one is a single HTML file with the motion built in: preview it, download it, or hand it to your AI agent with the remix prompt and make it yours. Free for any project.
How to turn a template into a live site, step by step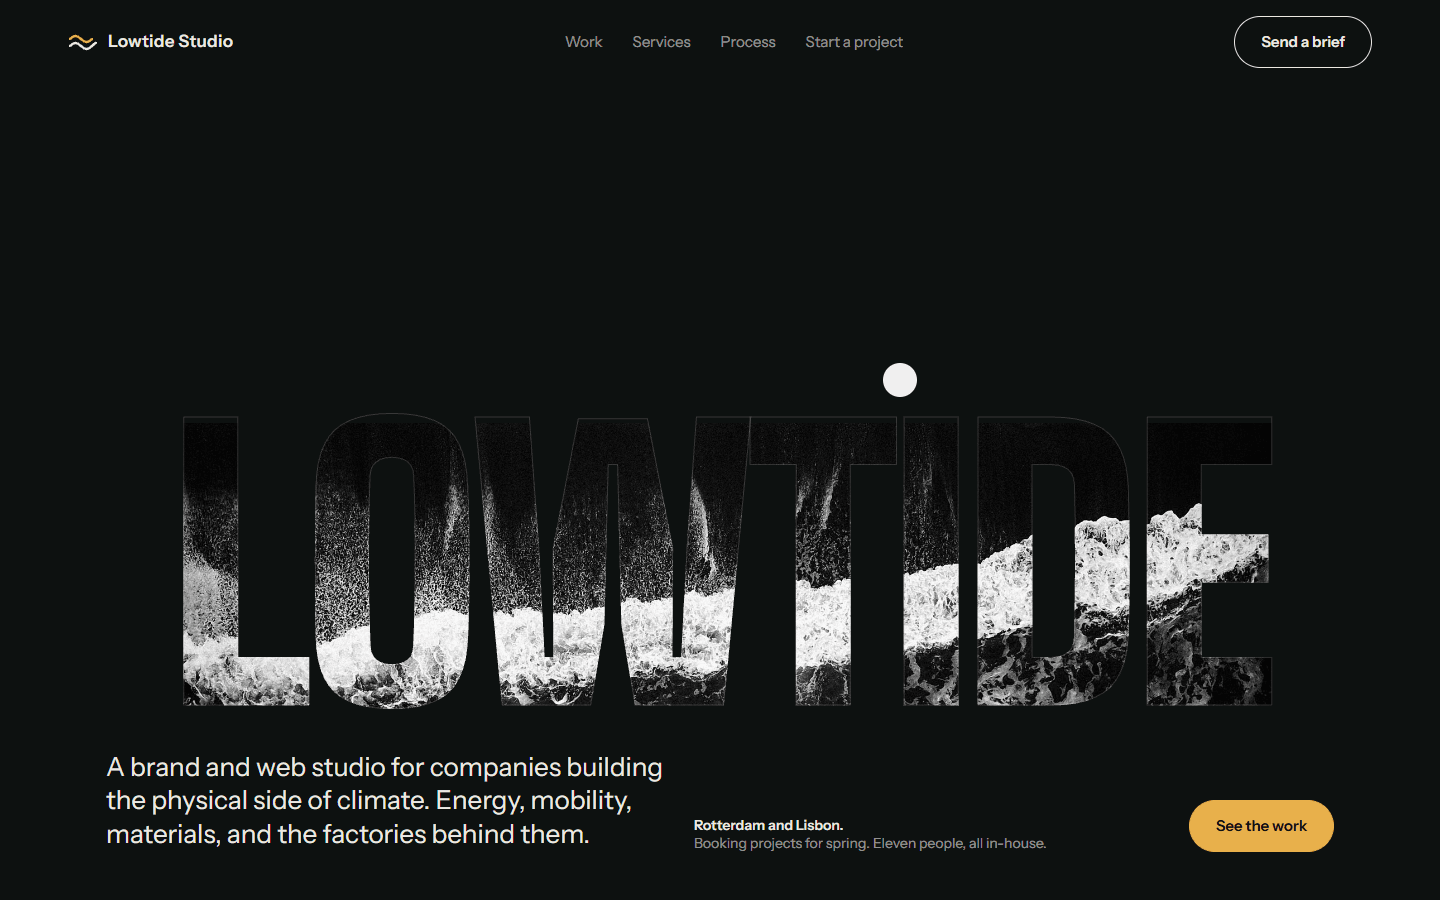
Lowtide
A dark studio site where the name fills the screen in condensed capitals made of moving sea water, followed by case studies with parallax photos and hard outcome numbers.
Agencies and studios · 21 November 2026
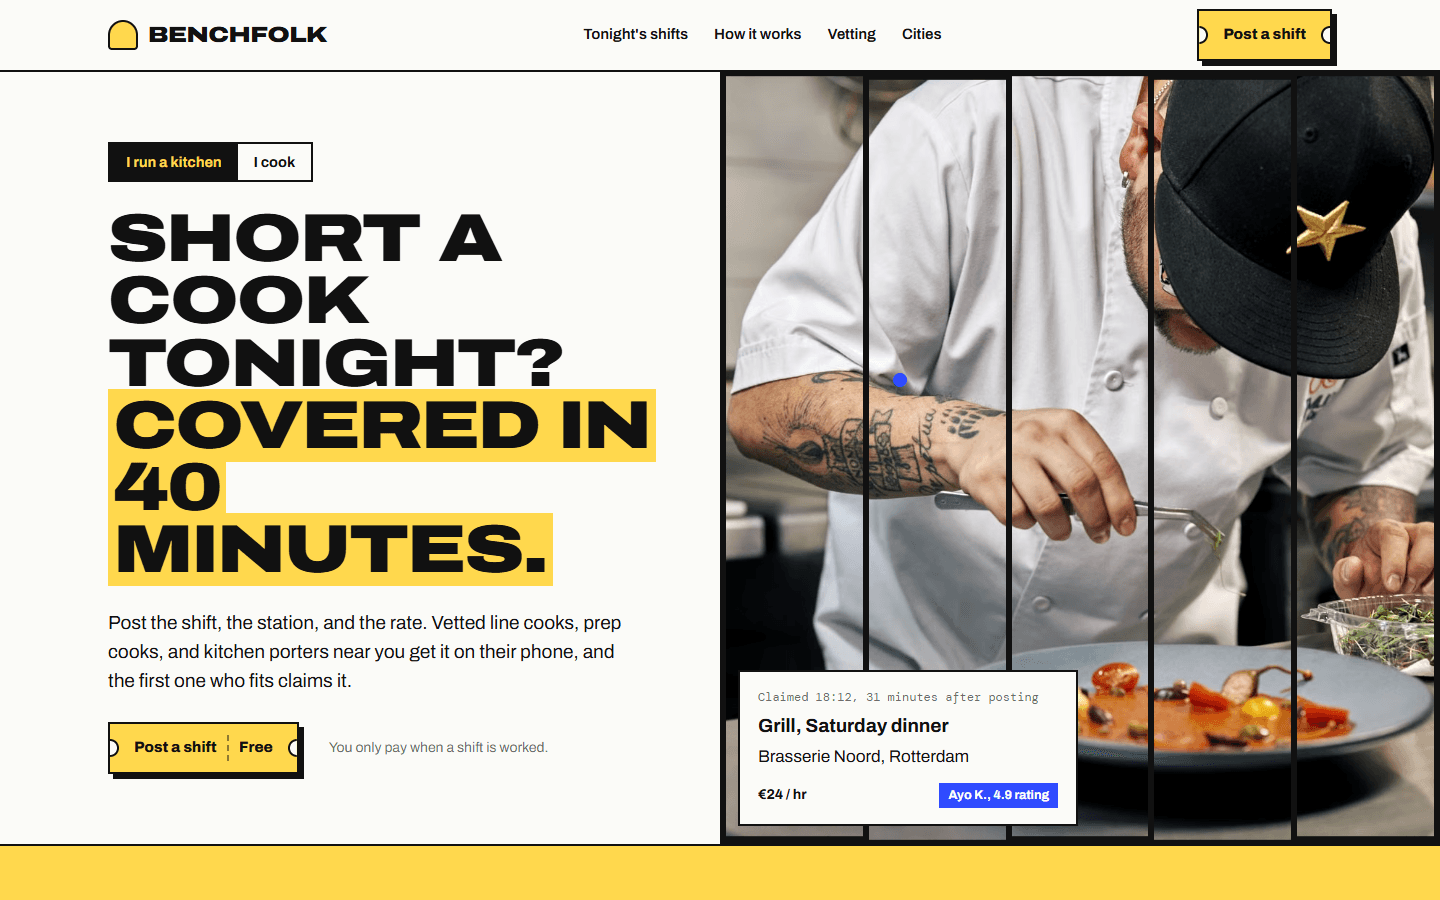
Benchfolk
A two-sided marketplace site for kitchen shift work, with a toggle that rewrites the hero for kitchens or cooks, a photo split into five sliding slices, and shift tickets you could claim tonight.
Platforms and marketplaces · 21 November 2026
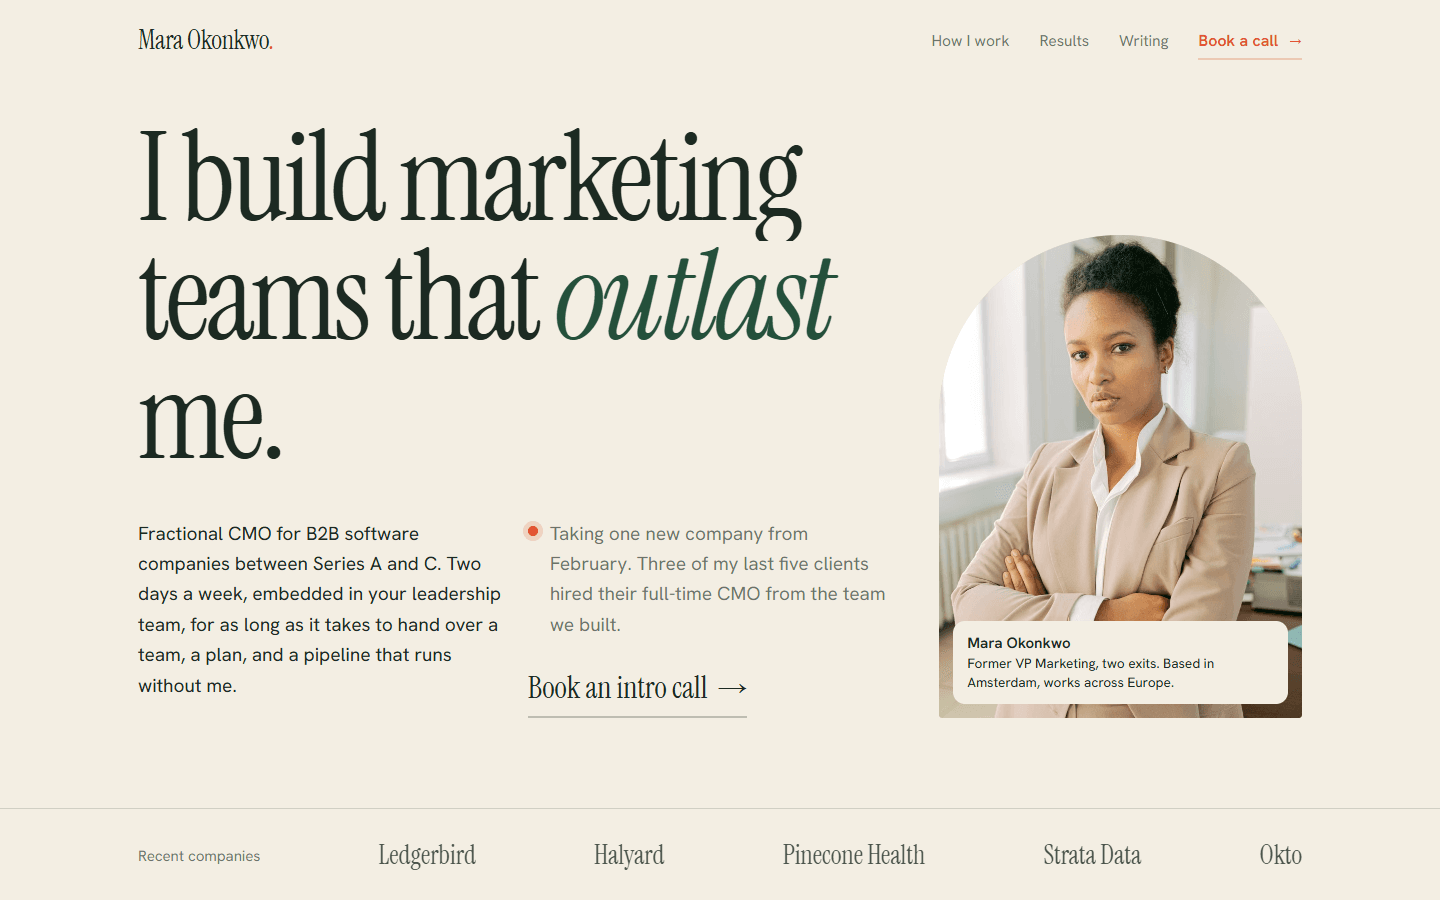
Mara Okonkwo
An editorial one-person site for a fractional CMO, with a headline that slides in line by line, a manifesto whose words light up as you scroll, and case studies that turn the cursor into a tomato-red read label.
Freelance and fractional · 21 November 2026
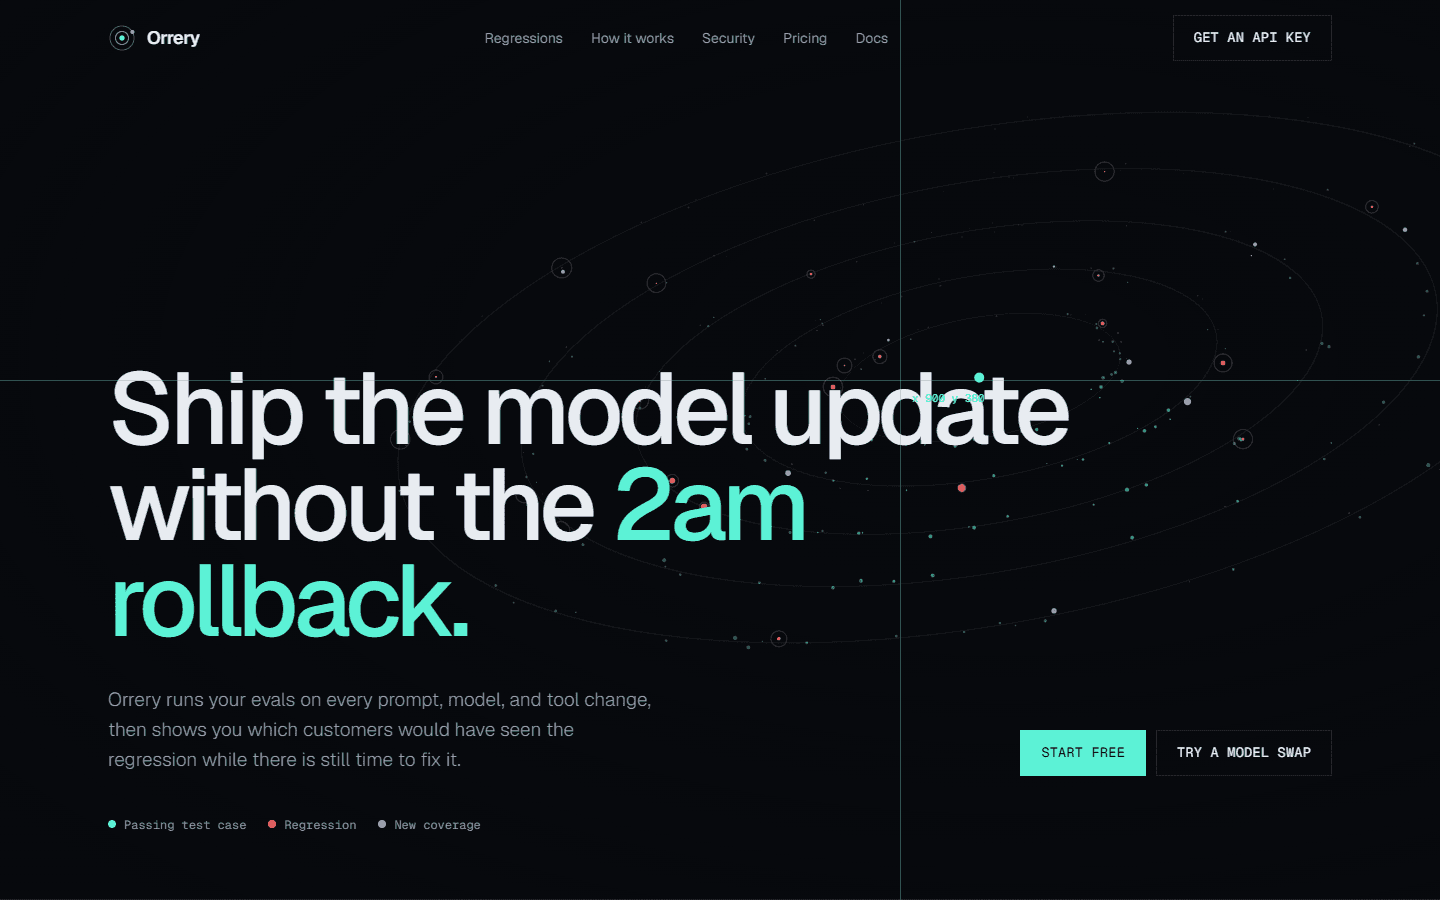
Orrery
A dark AI product site for an LLM evaluation platform, with a canvas orrery of test cases in the hero and a live table where you swap models and watch regressions appear.
AI products · 21 November 2026
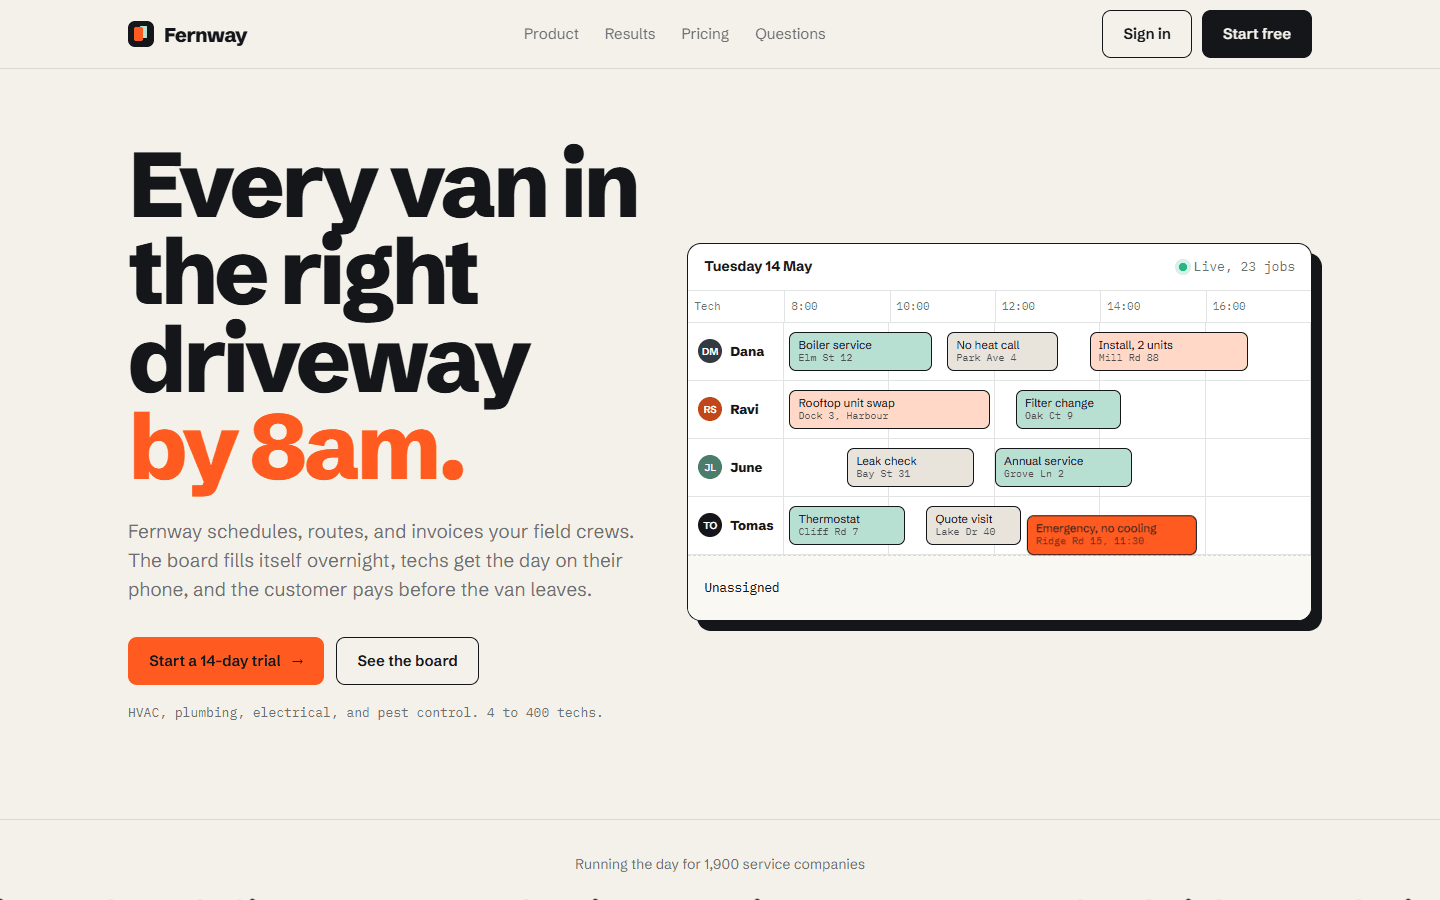
Fernway
A SaaS product site for field service dispatch software, where the hero is a live dispatch board that schedules an emergency job into a technician's day while you watch.
SaaS · 21 November 2026
Step-by-step guide
How to turn a free template into a live site with Claude, Vercel, Sanity, and Contengi
A template is a finished design in one file. This guide turns it into a real business site you can edit without code: Claude Code rebuilds it as a Next.js app, Vercel hosts it, Sanity holds the words and images your team will change, and Contengi writes and publishes the blog. Budget an afternoon for the first one.
Claude Code
Rewrites the template and builds the app. Needs a Claude Pro or Max plan, or an API key.
GitHub
Stores the code. Vercel deploys from it on every push.
Vercel
Hosts the site. The Hobby plan is for personal projects; a business site needs Pro.
Sanity
The content studio for page copy, case studies, team, and posts. Free plan to start.
Contengi
Researches, writes, and publishes blog posts to the site in your brand’s voice.
- 1
Pick a template and download it
Choose the template closest to the site you need, judged on structure as much as looks. A SaaS template already has product views and pricing, a freelance one has an offer, proof, and a booking step. Colours and copy are the easy part to change.
Click Download HTML on the template page, make a new folder for the project, and save the file inside it as index.html. Open it in your browser once so you know what you started from.
- The template opens in your browser
- You have a project folder with index.html inside
- 2
Make it yours while it is still one file
Rewrite the copy before you turn it into an app, because a single HTML file is the fastest thing to iterate on. Open a terminal in the project folder, run claude to start Claude Code, and paste the template’s remix prompt with the brackets filled in: your name, offer, audience, services, and proof.
Ask for one change at a time and refresh the browser after each. Brand colours and fonts go in now too. Swap the stock photos for your own when you have them, and keep the Pexels credit for any photo that stays.
Follow-up prompt for brand colours and fontsChange the palette in index.html to my brand colours: [primary hex], [secondary hex], [background hex], [text hex]. Keep every contrast ratio at 4.5:1 or better for body text. Replace the fonts with [display font] and [body font] from Google Fonts. Keep the layout, motion, and reduced-motion handling exactly as they are.
- Every heading and paragraph is your copy
- Brand colours and fonts are in
- It still looks right on a phone (open your browser’s device toolbar)
- 3
Ask Claude Code to rebuild it as a Next.js app
A single file is perfect for a landing page, but a business site needs more pages, a blog, and content someone else can edit. Next.js handles all three and is what Vercel is built for.
In the same folder, give Claude Code the prompt below. It splits the page into components, keeps the animations, and leaves you with an app that runs locally. When it finishes, run npm run dev and open localhost:3000 to compare it side by side with index.html.
Prompt: convert the template to Next.jsTurn index.html into a Next.js app (App Router, TypeScript) in this folder. 1. Split each section of the page into its own component in components/, with the copy passed in as props so it can come from a CMS later. 2. Move the CSS into a global stylesheet or CSS modules. Keep every animation, hover effect, and the prefers-reduced-motion handling. Run browser-only scripts in client components inside useEffect. 3. Load the Google Fonts with next/font. 4. Use next/image for photos and allow images.pexels.com in next.config. 5. Add metadata (title, description, Open Graph image), a sitemap.ts, and a robots.ts. 6. Keep index.html in the folder as the reference. When done, list anything that looks or behaves differently from it.
- npm run dev shows the site at localhost:3000
- The animations match the original file
- No errors in the browser console
- 4
Put the code on GitHub
Create an empty private repository on github.com (no README, so there is nothing to merge). Then ask Claude Code to commit the project and push it to that repository. It will set up the .gitignore so node_modules and secret files stay out.
From here on every change goes through GitHub, which gives you a history to roll back to if an edit goes wrong.
Prompt: first commit and pushInitialise git in this folder if it is not already, add a .gitignore for Next.js that excludes .env* files, commit everything, and push to https://github.com/[your-account]/[repo-name] on the main branch.
- 5
Deploy on Vercel and add your domain
Sign in to vercel.com with GitHub, click Add New, then Project, and import the repository. Vercel detects Next.js on its own, so leave the settings as they are and press Deploy. A minute later the site is live on a .vercel.app address.
Under the project’s Settings, Domains, add your own domain and create the DNS records Vercel shows you at your domain registrar. HTTPS is issued automatically once the records resolve. Every push to main now deploys to production, and every other branch gets its own preview link.
- The .vercel.app address loads the site
- Your domain shows a valid certificate
- Vercel Analytics is switched on under the Analytics tab
- 6
Add Sanity so the copy can change without code
Sanity gives the site an editing studio. You decide which parts of the page are editable, such as the hero, services, case studies, team, and testimonials, and the site reads them from Sanity instead of from the code. Add a post type now as well, because step 7 saves the blog there.
Run the prompt below in Claude Code. It creates the Sanity project, embeds the Studio at /studio on your own site, writes the schemas from the components it built in step 3, and moves your current copy into Sanity so nothing is lost. When it asks you to log in to Sanity, do so in the browser window it opens.
Add the Sanity environment variables it lists to Vercel under Settings, Environment Variables, and redeploy. Add your live domain to the Sanity project’s CORS origins (sanity.io/manage, API) so the Studio works on it.
Prompt: add SanityAdd Sanity to this Next.js app. 1. Create a new Sanity project and a "production" dataset, and embed Sanity Studio at /studio using next-sanity. 2. Write schemas for the editable parts of the site, based on the components in components/: one singleton document per page with a field for each section, plus collections for [case studies, team members, testimonials, services]. 3. Add a "post" document type with title, slug, seo_title, meta_description, excerpt, body_html (text), faq (array of question and answer), author_name, featured_image (url), status (draft or published), and published_at. 4. Fetch the content with GROQ in server components and revalidate with tags, so a published change in the Studio shows on the site within a minute. 5. Import the copy currently in the components into Sanity so the site looks identical afterwards. 6. Render /blog and /blog/[slug] from published posts. 7. List every environment variable I need to add in Vercel. Keep any write token server-only.
- localhost:3000/studio opens the Studio
- Editing the hero headline in the Studio changes the live site
- The /blog page loads, empty for now
- 7
Connect Contengi to write and publish the blog
In Contengi, go to Settings, Integrations, and add a custom website with the endpoint https://[your-domain]/api/contengi. Copy the signing secret it shows you.
Paste the prompt below into Claude Code. It builds the endpoint Contengi publishes to: it checks the signature on every request, saves each post into Sanity as a post document keyed on its slug, and refreshes the blog pages. Add the signing secret to Vercel as CONTENGI_SIGNING_SECRET, together with a Sanity token with Editor rights as SANITY_API_WRITE_TOKEN, and redeploy.
Back in Contengi, press Test. It sends a signed test post that stores nothing; a 200 with a URL means the connection works.
Prompt: the Contengi endpoint, storing posts in SanityAdd a Contengi publishing endpoint to this site at /api/contengi. This is a Next.js App Router app on Vercel, and posts are stored in Sanity as "post" documents (see the schema). 1. Verify every request. Read the raw body, compute HMAC-SHA256 of "<X-Contengi-Timestamp>.<raw body>" using the CONTENGI_SIGNING_SECRET environment variable, and compare it to the X-Contengi-Signature header (format sha256=<hex>) with a constant-time check. Reject timestamps older than five minutes. 2. POST: upsert the post keyed on "slug", never on "blog_id", using a Sanity client with SANITY_API_WRITE_TOKEN (server only). Store title, seo_title, meta_description, excerpt, body_html, faq, author_name and featured_image, and set status to published. If "test" is true, store nothing. Revalidate the blog list and the post page, then reply 200 with {"url": "<the post's live URL>"}. 3. PATCH with action "unpublish": set the post at "slug" back to draft so its URL returns 404. Keep the document. 4. DELETE with action "delete": remove the post at "slug". 5. Render posts at /blog/[slug] and list them at /blog, with seo_title and meta_description in the page head.- Test in Contengi returns 200
- CONTENGI_SIGNING_SECRET and SANITY_API_WRITE_TOKEN are set in Vercel, not in the code
- 8
Teach Contengi your brand and publish the first post
Contengi writes from your brand’s knowledge base, so fill that in before the first article: what you sell, who for, your point of view, your tone of voice, and the words you never use. The more specific it is, the less you edit afterwards.
Then pick a topic from the SEO opportunities or give the agent one of your own, review the draft, and publish it. It lands in Sanity as a post and appears at /blog/[slug] on your site. Edits made in Contengi republish to the same URL, and unpublishing from the Contengi CMS takes the post down.
- The first post is live on your domain
- It shows in the Sanity Studio under Posts
- The page title and meta description match what Contengi sent
- 9
Run the launch checks
Before you share the link, go through the list below. Most of it takes a minute, and it is the difference between a site that looks finished and one that gets found.
- Every page has its own title, meta description, and Open Graph image
- sitemap.xml and robots.txt load on your domain
- The domain is verified in Google Search Console and the sitemap is submitted
- Lighthouse scores 90 or more on a phone for performance, accessibility, and SEO
- The site works with reduced motion switched on in your device settings
- Photo credits are kept for every stock photo still on the site
- Contact forms send somewhere real, and you have tested one
FAQ
Questions about the templates
Are these website templates really free?
Yes. Every template is free to use, edit, and ship on personal and commercial projects, with no sign-up and no credit required. Photos come from Pexels under the Pexels licence, so keep the photographer credits for any photo you leave in.
What do I get when I download a template?
One HTML file with the CSS and JavaScript inside it. There is no build step, no framework, and no package to install: open it in a browser to see it, edit it in any text editor, and upload it to any host to put it live.
How do I turn a template into my own site with AI?
Every template comes with a remix prompt. Download the HTML, paste it into Claude, ChatGPT, Cursor, or any coding agent together with the prompt, and fill in the bracketed parts with your name, offer, and copy. The prompt tells the agent what to keep, so the motion and layout survive the rewrite.
What kinds of websites are the templates for?
Sites for SaaS companies, AI products, freelancers and fractional leaders, platforms and marketplaces, agencies, startups, consultancies, and creators. Each template is built around what that kind of site needs, and each uses its own layout idea, button style, cursor effect, and scroll effect.
Can I add a blog to a site built from one of these templates?
Yes. Contengi publishes to sites built with Claude, v0, or any custom code through a signed webhook, so the articles your agents write land on the site you built from the template. The website integrations page explains the setup.
Do the templates work on phones?
Yes. Each template is checked at six screen widths, from a 375px phone to a 2560px monitor, and cannot be published if anything scrolls sideways or text is cut off. Animations switch off for visitors who ask their device for reduced motion.
Do I need to know how to code to follow this guide?
No. Claude Code writes the code from the prompts in each step. You need to be comfortable opening a terminal, pasting a prompt, and copying values into Vercel and Contengi settings.
Can I skip Sanity?
Yes. Without Sanity the page copy stays in the code, which is fine if only you edit it through Claude Code. For the blog, the Contengi endpoint can store posts in any database or as files in the repo instead.
Can I host somewhere other than Vercel?
Yes. Netlify, Cloudflare, and any Node host run Next.js, and the Contengi endpoint works the same on all of them. For the downloaded HTML file on its own, any static host works, no build step needed.